ZEO ScientifiX, Inc. Nova Southeastern University Center for Collaborative Research 3300 S. University Drive, Suite 246 Fort Lauderdale, FL 33328 www.zeoscientifix.com
Step 02 - Copy the signature above
Tip: Drag your mouse from the top green circle to the bottom, then right click and choose "copy". Make sure you copy the extra spaces on top and bottom to accomodate for the confidentiality block that is automatically added by our system.
Step 03 - Add the signature to your e-mail client
Please choose the email client below for installations intructions:
Microsoft Outlook (Windows)
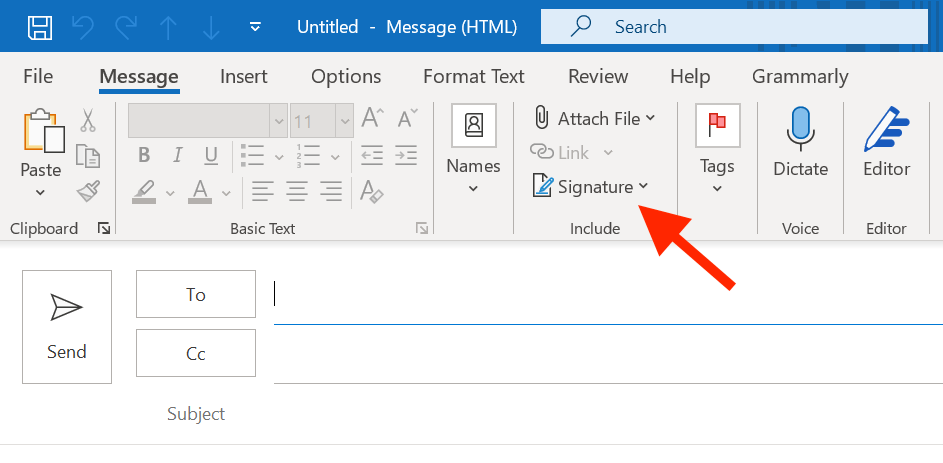
Step 3A - Open Outlook, Compose a new message and click on Signature
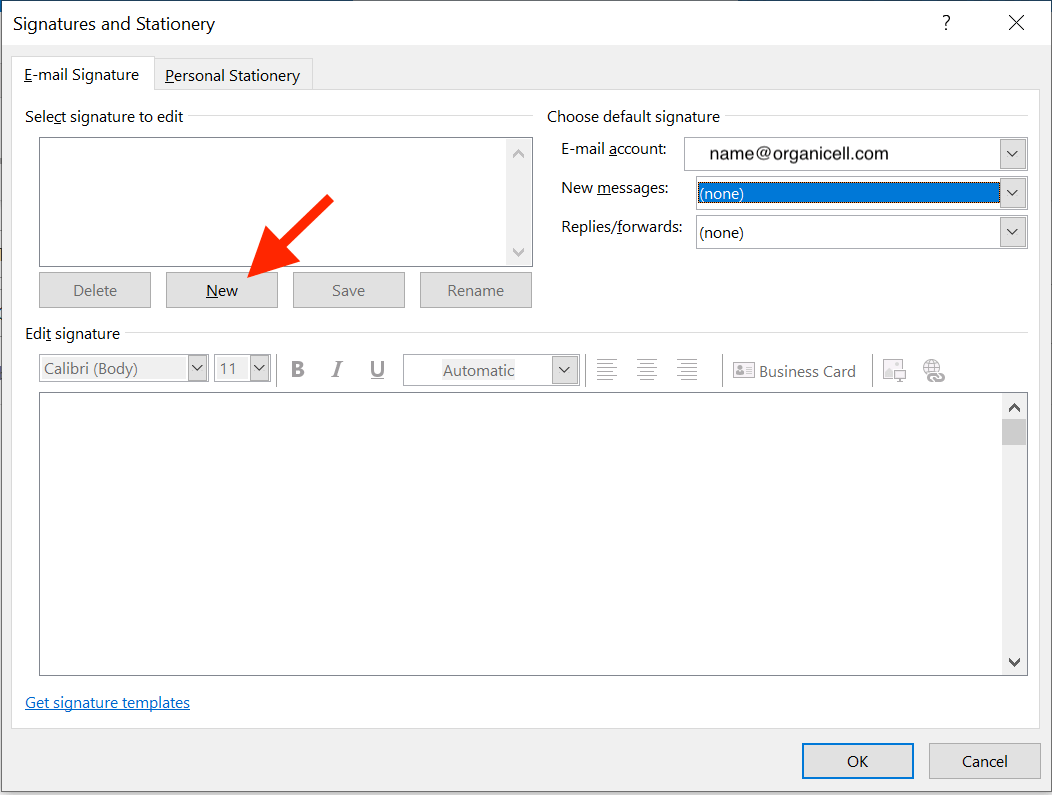
Step 3B - On Signatures and Stationery, select the E-mail Signature tab and click New
Step 3C
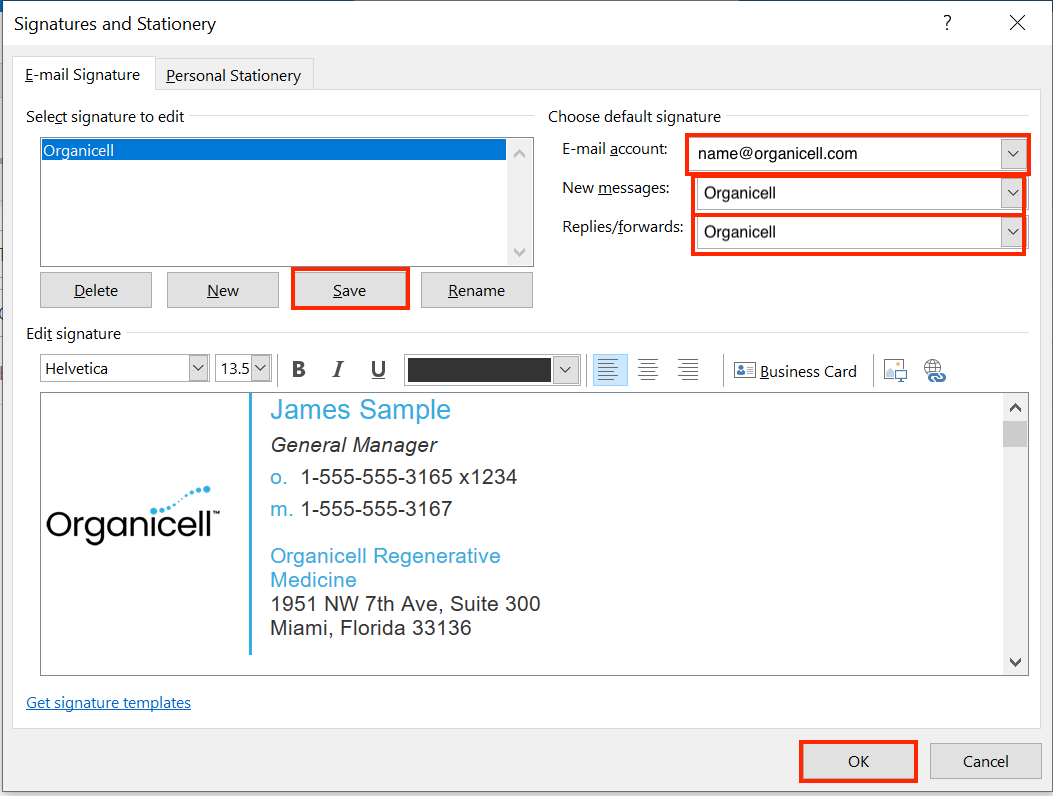
• Type ZEO ScientifiX for the new signature name.
• On the Edit signature section, right click and paste your signature (Copy the signature following the steps on the top of this page.)
Important:Your signature might look different and even broken after you paste. THIS IS NORMAL.
Do NOT alter anything in the signature box.
• Confirm your e-mail account is correct;
• Choose ZEO ScientifiX as the default signature for New Messages
• Click Save
• Click OK.
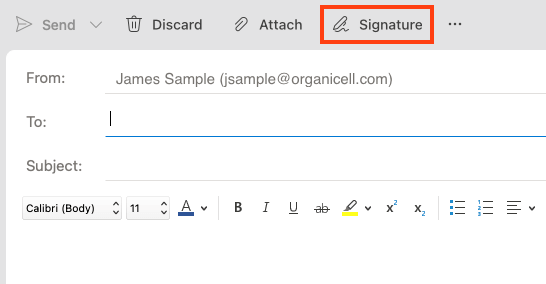
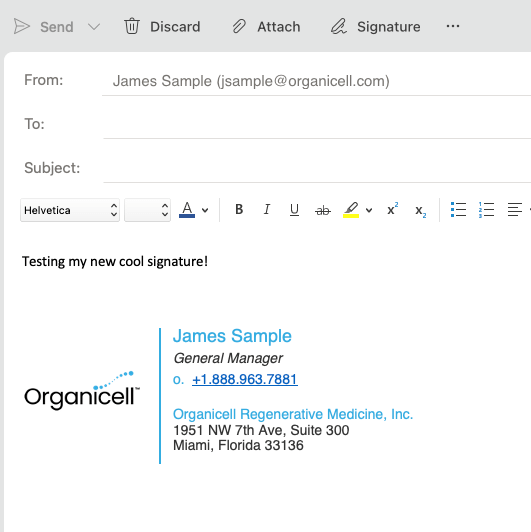
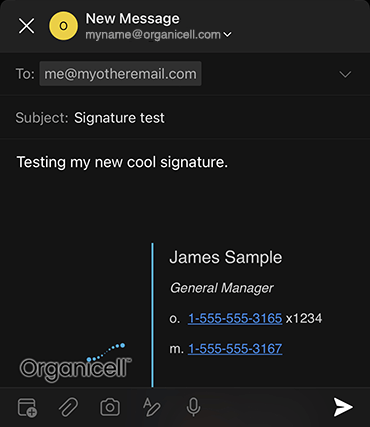
Step 3D - Your new signature is ready! Compose a new message and send a test email to yourself to check everything looks good.
Microsoft Outlook (MacOS)
Step 3A - Open Outlook, Compose a new message and click on Signature and Edit Signature
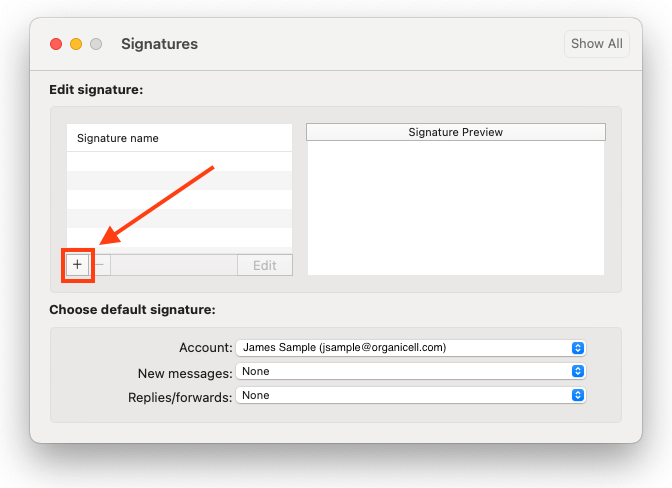
Step 3B - On Signatures, select the E-mail Signature tab and click the Add (+) sign.
Step 3C
• Type ZEO ScientifiX for the Signature Name.
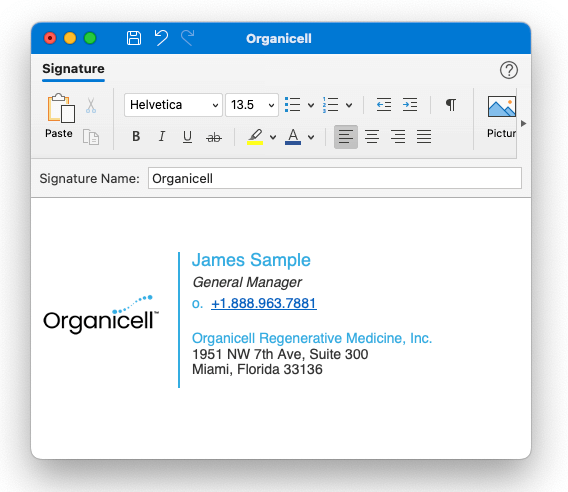
• On the signature body, delete any previous text and paste your signature (Copy the signature following the steps on the top of this page.)
Important:Your signature might look different and even broken after you paste. THIS IS NORMAL.
Do NOT alter anything in the signature box.
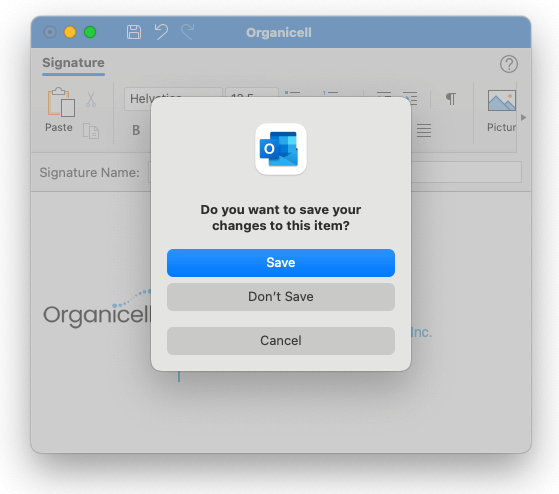
Step 3D
• Close the signature window and choose Save.
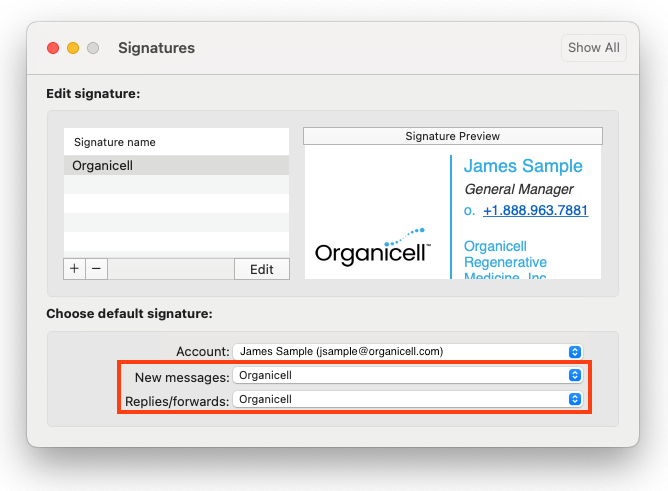
Step 3E
• Confirm your e-mail account is correct;
• Choose ZEO ScientifiX as the default signature for New Messages and Replies/forwards.
• Close the Signatures window.
Step 3F - Your new signature is ready! Compose a new message and send a test email to yourself to check everything looks good.
Microsoft Outlook (iOS)
Step 3A - On your phone, follow the instructions on top of this page to generate your signature.
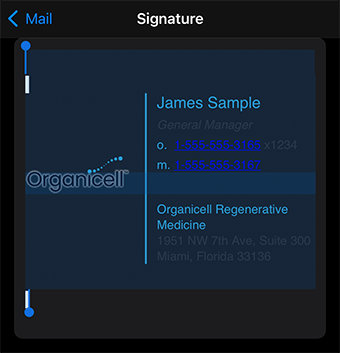
• Press and hold to select the signature, then place the two blue handlers using the two green circles as a guide to select the signature like the image below.
• Once the signature is selected, tap Copy.
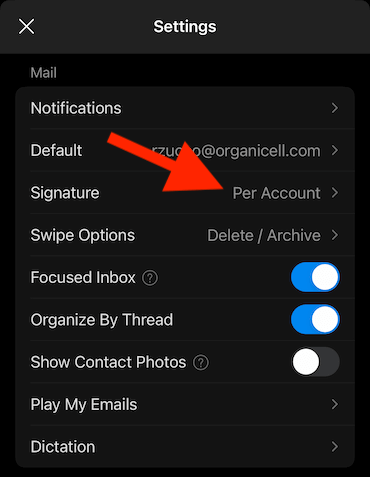
Step 3B - Open Outlook App, Click on the Account Menu icon (1) then on the Settings ⚙ gear icon (2).
Step 3C - Scroll down and tap Signature.
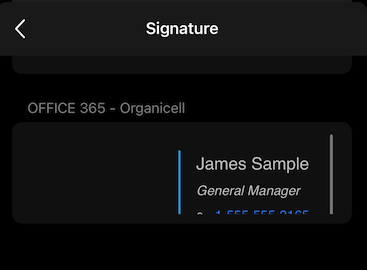
Step 3D - Tap hold and paste your signature into the empty signature space.
Important:Your signature might look different and even broken at this step. THIS IS NORMAL.
Do NOT alter anything in the signature box.
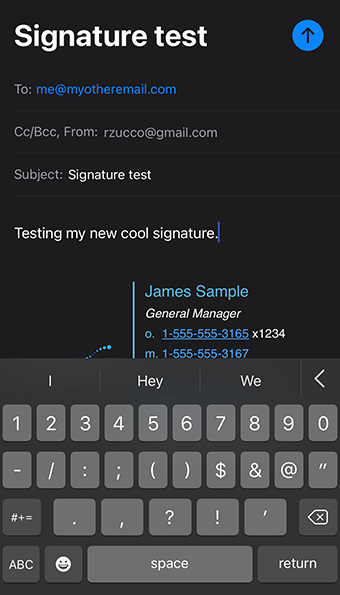
Step 3E - Your new signature is ready! Compose a new message and send a test email to yourself to check everything looks good.
iPhone Mail App (iOS)
Step 3A - On your phone, follow the instructions on top of this page to generate your signature.
• Press and hold to select the signature, then place the two blue handlers using the two green circles as a guide to select the signature like the image below.
• Once the signature is selected, tap Copy.
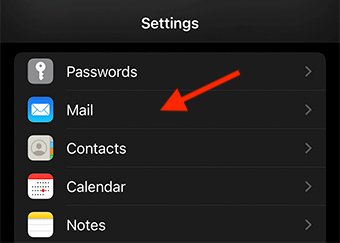
Step 3B - Open your phone Settings, then choose Mail.
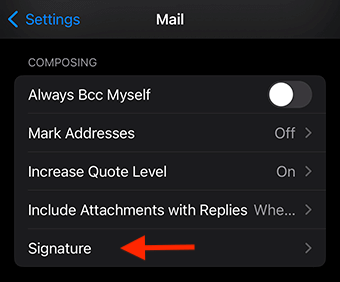
Step 3C - Scroll down to the very bottom of the page and tap Signature.
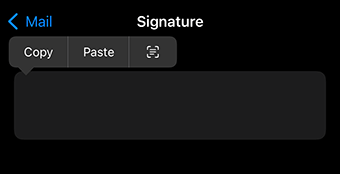
Step 3D - Tap hold and paste your signature into the empty signature space.
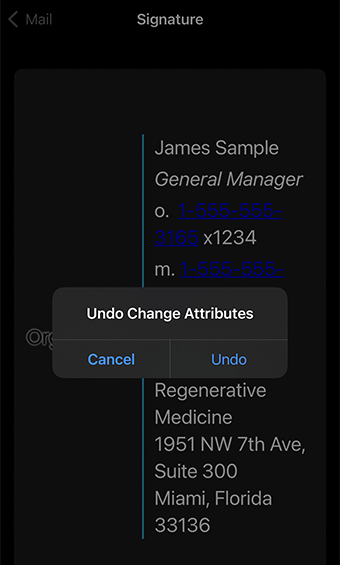
Important:Your signature will look different at this step. We need to fix that.
Step 3E - SHAKE YOUR PHONE and click Undo Change Attributes.
Step 3E - Your signature should look good now. Click Mail to go back and exit settings.
Step 3G - Your new signature is ready! Compose a new message and send a test email to yourself to check everything looks good.
Apple Mail (MacOS)
Step 3A - Open the Mail app. On the Apple bar, click on Mail, then Preferences.
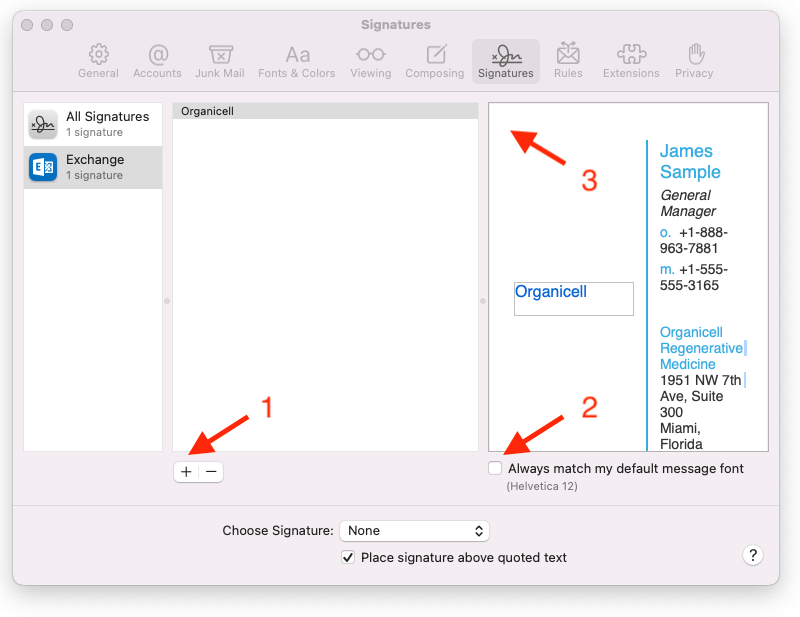
Step 3B - Click on the Plus Sign (+) to add a new signature. Name it Oganicell.
Step 3C - Uncheck the Always match my default message font (2).
Step 3D - On the signature area (3), erase the previous signature, then paste the signature you created following the steps on the top of this page.
Important:Your signature might look different and even broken at this step. THIS IS NORMAL.
Do NOT alter anything in the signature box.
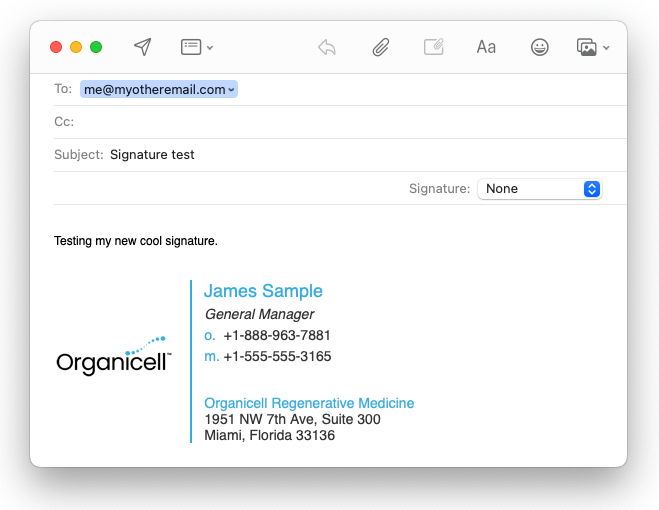
Step 3E - Your new signature is ready! Compose a new message and send a test email to yourself to check everything looks good.